To connect a wireless thermostat to your boiler, mount a receiver unit at the boiler terminals (T, COM, NO, or OpenTherm), position the transmitter approximately 1.5 metres above floor level on an interior wall away from direct sunlight, then pair both devices using the sync button. The full installation process takes 30–60 minutes for most homeowners.
In the past, adjusting the temperature meant a trip down the hallway to a fixed, wall-mounted dial. Upgrading to a cable-free setup changes that entirely, liberating you from the restrictive cables of traditional systems and giving you climate management from the palm of your hand. If you are ready to bring your central heating into the modern era, read on for a complete step by step guide.
What Is a Wireless Thermostat?
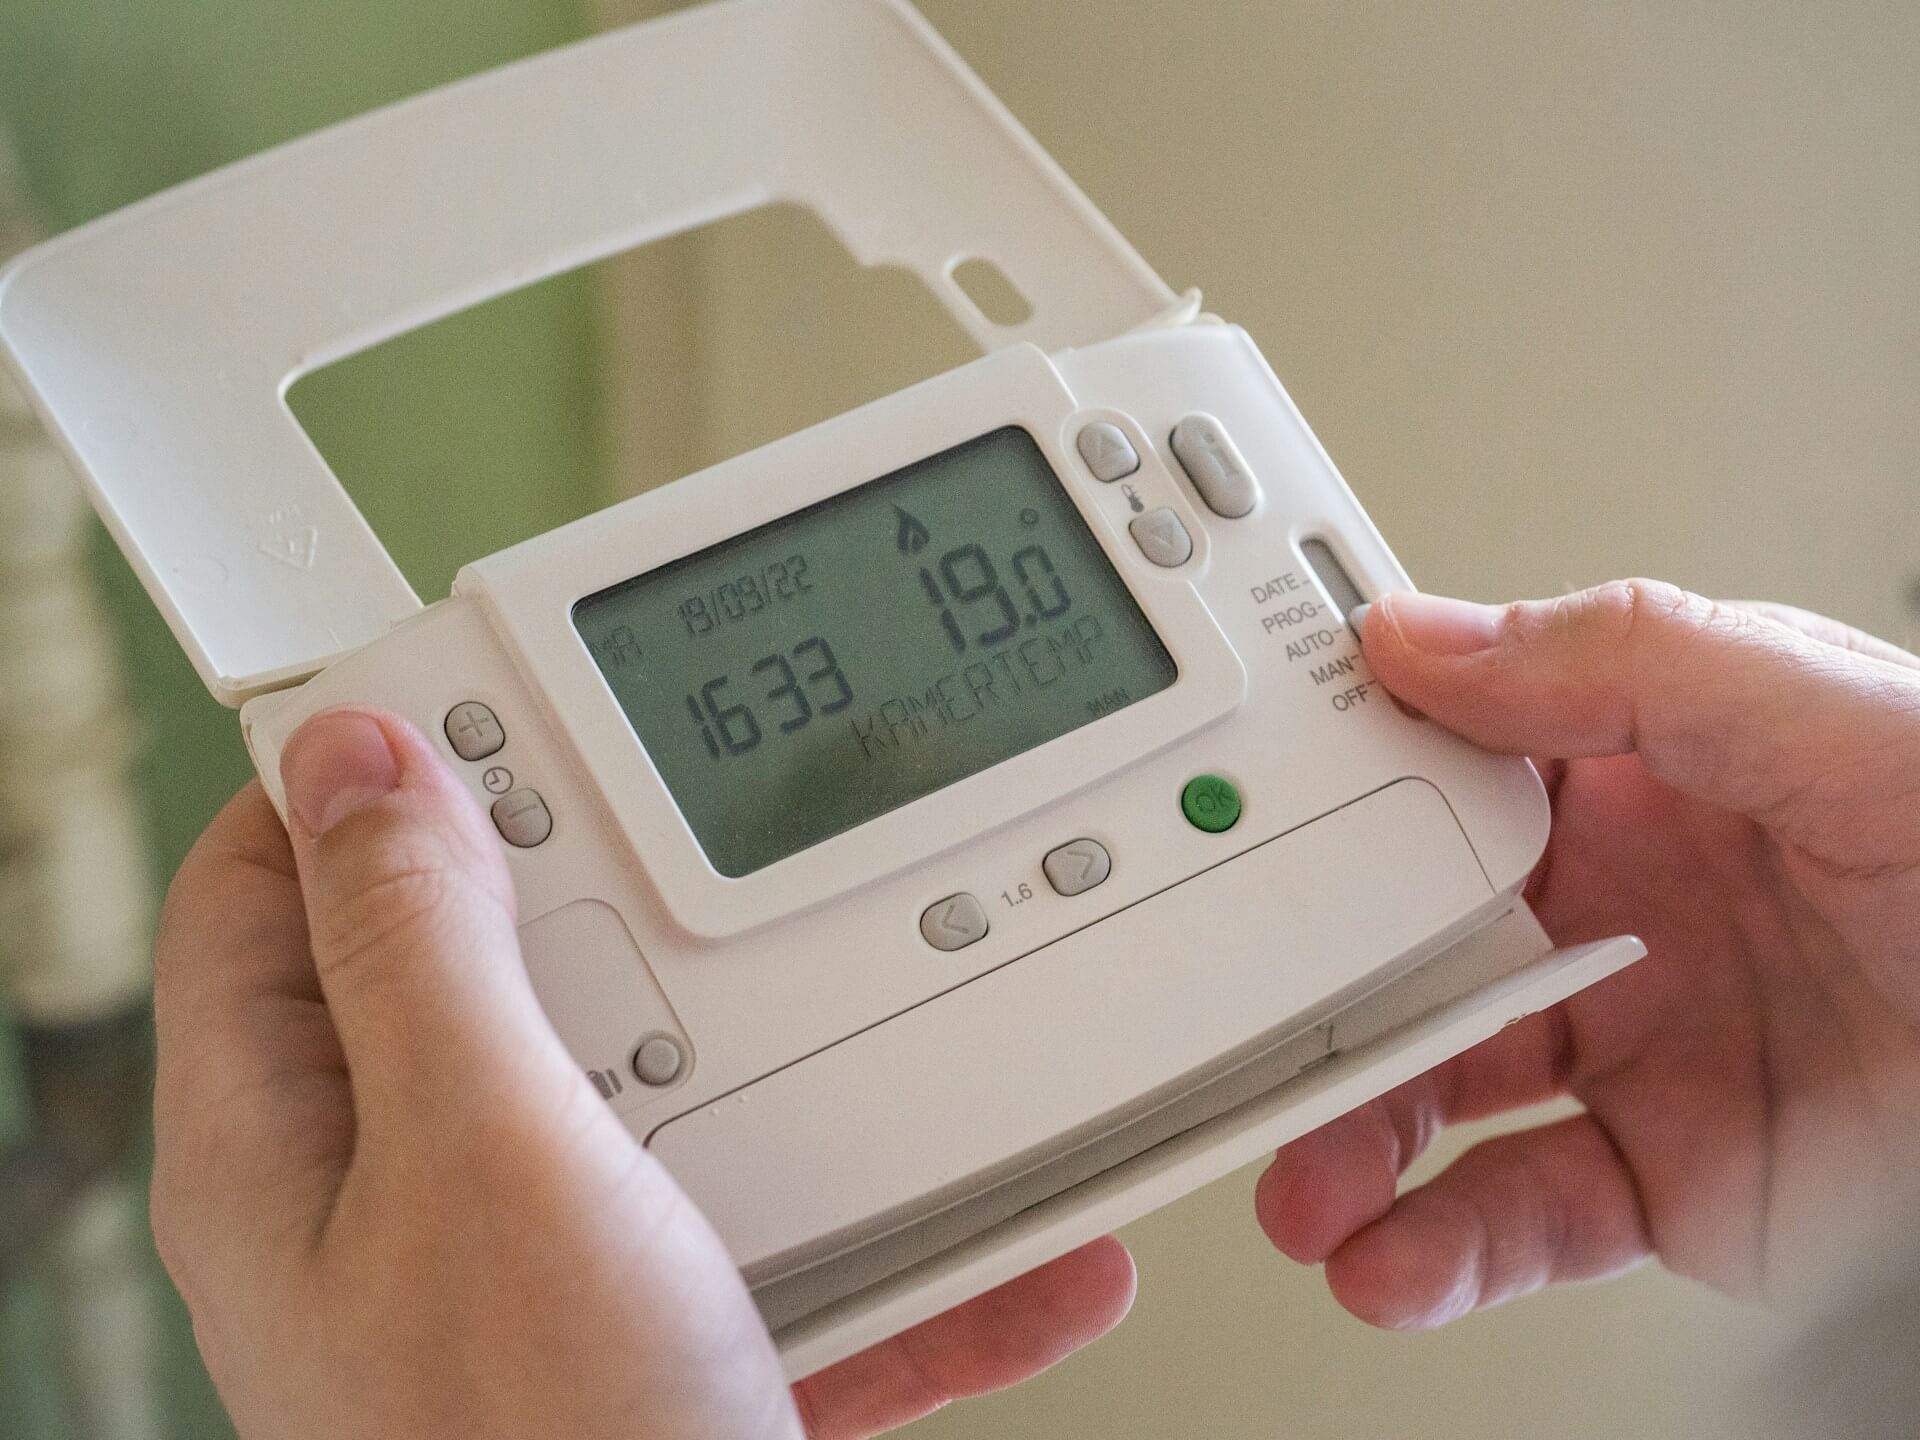
A wireless thermostat is a device that controls your heating system without a physical cable between the controller and the appliance. Using technologies like Wi-Fi, radio frequency (433–868 MHz), or Bluetooth, it allows the unit to communicate wirelessly with the appliance. The controller sends an on/off signal to a receiver wired at the appliance terminals, triggering heat demand within 1–2 seconds.
- sensing temperature remotely,
- setting programmable schedules (up to 7-day programming on most models),
- monitoring usage patterns,
- fine-tuning heating preferences by room,
- reducing heating bills by up to 30% compared to manual dial systems.
In addition, a smart thermostat integrates with automation platforms (Google Home, Amazon Alexa, Apple HomeKit), enabling management via smartphone applications or voice commands.
What Are the Benefits of a Wireless Thermostat?
These cable-free devices offer measurable efficiency and convenience advantages.
Thanks to precise management and programmable schedules, homeowners can determine exactly when their heating system activates. You can program the unit to switch off when no one is present to conserve energy — studies show an 8–12% saving per degree reduction in setpoint temperature. This flexibility allows you to manage heating remotely, ensuring you never waste fuel.
These devices offer zoned management, enabling different areas to maintain distinct temperatures. A single device controls the main circuit, while additional smart radiator valves (TRVs) can manage individual rooms. For example, bedrooms typically run 2–3°C cooler than living areas.
Moreover, these units integrate smoothly with other smart home systems. With voice command features, you can adjust preferences hands-free.
How Does a Wireless Thermostat Connect to a Boiler?
Understanding how to connect wireless thermostat to boiler units is key to operation. The controller links via a receiver, which is wired directly to the boiler. This receiver acts as a bridge, instructing the appliance to start or stop based on your desired thermostat settings.
The receiver attaches to terminals on the boiler, often labeled T, COM, NO, or OpenTherm. The connection type determines functionality:
| Protocol | Capability | Compatible boilers |
|---|---|---|
| On/Off (T/COM/NO) | Basic heat demand only | All boilers |
| OpenTherm | Modulating operation, efficiency gains of 10–15% | OpenTherm-compatible boilers |
While most modern boilers are generally compatible, it is important to confirm that your specific unit works with the system. Properly connecting the thermostat to your boiler ensures consistent temperature regulation.
How to Prepare for Installation
To start, verify that your new device is compatible with the appliance. Consult the manufacturer's specifications to ensure a match. Once compatibility is established, check if your boiler has the necessary wiring connections (T, COM, NO, or OpenTherm). This preparation is vital when you plan to connect a wireless thermostat.
Before you begin the process:
- Turn off the power to your boiler to prevent electrical risks.
- Decide whether to install it yourself or hire a qualified professional.
If you are unsure how to handle internal wires or the boiler circuit, enlisting a professional installer is recommended to ensure safety and compliance with regulations.
Checking Boiler Compatibility
To ensure your wireless thermostat functions effectively, verify compatibility with your boiler type, such as a combi or system boiler. Most modern boilers support standard radio protocols, but checking technical specifications is crucial. Using advanced systems like OpenTherm can enhance efficiency by up to 15% if both the device and boiler support it.
Confirm that your boiler supports the wiring configurations required by the receiver. Wiring diagrams vary depending on the model, so ensure the labels (like T, COM, or NO) correspond to the device requirements. This step is vital for a hassle-free installation.
Safety Precautions
When you are ready to connect a wireless thermostat, safety is essential. Switch off the breaker before touching any wires. This protects you from electrical hazards while working on the boiler terminals.
Equip yourself with appropriate tools. Ensure all joints are tight and insulated to prevent short circuits. If you are not experienced with boiler systems, hiring a professional ensures the device is installed safely and adheres to legal standards.
How to Install a Wireless Thermostat
This step by step guide will help you set up your system. First, assess the area and wiring. Place the receiver unit close to the appliance, mounting it on a wall for easy access. Wire the receiver to the boiler terminals (T, COM, NO, etc.) following the manufacturer's instructions. This electrical link allows the controller to manage the appliance.
Next, determine a suitable location for the transmitter. It should be about 1.5 metres above the floor on an interior wall. Avoid placing it in direct sunlight or near heat sources, as this affects the temperature reading by up to 5°C. Once the receiver is installed, pair the controller with the receiver to enable communication. The installed position should be away from interference sources. If you are unsure how to connect a wireless thermostat receiver safely, rely on a professional.
Wiring the Receiver to the Boiler
To connect a wireless thermostat receiver, attach it securely to the appropriate boiler terminals. A strong link allows the receiver to transmit signals to the appliance based on controller commands. Place it close to the appliance to minimise interference.
Some protocols, like OpenTherm, may require specific wires or bridging changes. Adhere closely to the diagrams to avoid damaging the appliance. Proper wiring is the foundation of a reliable heating system.
Mounting the Thermostat
Properly positioning the controller is key. Mount it on a central interior wall to gauge temperature accurately. Avoid spots exposed to direct sunlight or drafts, as these cause false readings of up to 3–5°C. A stable environment ensures precise regulation.
Secure the mounting plate to the wall and attach the unit to complete the installation. This approach prolongs the life of your device and guarantees consistent temperature management in every room.
Setting Up and Testing the Connection
To set up, switch on the boiler and the device. The next step is pairing the thermostat to your boiler via the receiver. Refer to your manual, as this usually involves pressing a pairing button on the two devices.
Once paired, link the device to your network. Using a smart thermostat app enables integration with your smart home system. Schedule your climate settings to keep the house warmer when needed and cooler when empty.
Pairing the Thermostat and Receiver
To pair the units:
- Switch them on.
- Press the pairing button or hold specific keys to enter pairing mode.
- Look for confirmation on the display.
If the wireless thermostat pairs successfully, it will manage the boiler. If not, check the batteries and ensure no obstacles disrupt the wireless signal.
Connecting to Wi-Fi and Smart Home Systems
Use the specific app to connect your thermostat to Wi-Fi. A stable Wi-Fi connection is essential for full smart home integration. Your Wi Fi network must have good coverage at the installation location. Follow the app prompts to input your Wi-Fi credentials. Once connected, you can modify thermostat settings via your phone, enhancing the smart home system experience.
Programming the Heating Control
Use the interface or app to set schedules. Customize profiles to fit your daily habits, keeping rooms warmer in the day and cooler at night, lowering by 2–3°C when asleep to save money. If you have zoned settings, you can manage each room individually. Regular adjustments ensure your home remains comfortable and the system runs efficiently.
Troubleshooting and Maintenance
Maintaining the device ensures it operates at peak efficiency. Issues often stem from communication breakdowns or drained batteries.
First, check the batteries in both the device and receiver. Replace them if low — most models use 2× AA batteries with a 1–2 year lifespan. Ensure the wireless signal is strong; if not, move them closer. Resetting devices can often resolve persistent glitches.
Regular upkeep includes swapping batteries annually and keeping firmware current. By diligently maintaining this installation, you ensure the system remains efficient.